Converting the Xiaomi LYWSD03MMC from Bluetooth to Zigbee
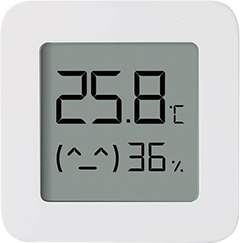
The Xiaomi LYWSD03MMC is one of those sensors everyone in the smart-home hobby ends up owning a handful of: a tiny square LCD temperature/humidity monitor that costs a few euros and, out of the box, only talks Bluetooth LE. I run Zigbee2MQTT already for the rest of the house, so rather than adding a Bluetooth proxy just for these, I converted mine to native Zigbee end devices.
Why convert instead of using BLE
The stock firmware advertises readings over BLE every ~10 minutes and needs an ESPHome Bluetooth proxy (or a BLE-capable HA host) in range. Once flashed to Zigbee, the sensor joins the existing mesh directly — same coordinator, same routers, same reliability as the rest of the Zigbee devices in the house, and Zigbee2MQTT exposes calibration offsets and display options that BLE integrations don't.
The trade-off: it's a one-way trip. Once the Zigbee firmware is on the Telink TLSR8251 chip, there's no Bluetooth firmware left. Going back to BLE means physical UART access to the board. Worth knowing before you commit a drawer full of these sensors.
Flashing over the air
No soldering, no disassembly beyond popping the back cover to reach the pairing button. Needs Chrome or Edge (Web Bluetooth) on a laptop or phone within range of the sensor.
- Open pvvx's TelinkMiFlasher in the browser.
- Tick "Get Advertising MAC", click Connect, and pair with the sensor from the Bluetooth device list (it'll show up as
LYWSD03orATCif you've flashed it before). - If it's still on stock Xiaomi firmware: click "Do Activation" first and wait for it to finish.
- Click "Custom Firmware ver 4.6" and "Start Flashing" — some hardware revisions cap OTA writes at 128kb, so this intermediate step avoids issues going straight to the Zigbee binary.
- Reconnect to
ATC_FXXXX, then select the Zigbee firmware (Z03MMC_v0118.binor newer from devbis/z03mmc, or pvvx's ZigbeeTLc fork) and Start Flashing again. - Once done, the sensor has no Bluetooth firmware left — it's now a Zigbee end device waiting to join.
On my own units the OTA route didn't work: they shipped with stock firmware v2.1.1, which the web flasher couldn't activate over Bluetooth reliably. I ended up flashing over USB-to-serial instead — same z03mmc.bin/ZigbeeTLc binary, just written via a UART adapter wired to the SWS pads on the board rather than OTA. Slower and requires opening the case, but it's the reliable fallback when the browser flasher won't cooperate with your firmware revision.
Pairing with Zigbee2MQTT
Same as any other Zigbee device: enable "Permit join" in Z2M, then either reinsert the battery or short the RESET and GND contacts on the board for a few seconds to trigger pairing. Zigbee2MQTT has supported the LYWSD03MMC model natively since 1.33.2, so on a current release it just joins and gets recognised — no external converter needed.
One thing to watch: the devbis firmware reports as LYWSD03MMC, while pvvx's newer ZigbeeTLc fork (v0120+) reports as LYWSD03MMC-z to tell them apart. If Z2M doesn't recognise the -z variant on your version, there's a small external converter to drop in the config folder that fixes it.
Two minutes of flashing per sensor, and it shows up in Home Assistant with temperature, humidity, battery, and — via Z2M — the display's temperature units, comfort-range smiley, and calibration offsets, all controllable from the dashboard instead of the tiny buttons on the device itself.